Snowflake Custom Transformation Job
Data Pipeline Studio (DPS) provides templates for creating transformation jobs. The jobs include Join/ Union/ Aggregate functions that can be performed to group or combine data for analysis.
For complex operations to be performed on data, Calibo Accelerate DPS provides the option of creating custom transformation jobs. For custom queries while the logic is written by the users, DPS UI provides an option to create SQL queries by selecting specific columns of tables. Calibo Accelerate consumes the SQL queries along with the transformation logic, to generate the code for custom transformation jobs.
To create a custom transformation job
-
Sign in to the Calibo Accelerate platform and navigate to Products.
-
Select a product and feature. Click the Develop stage of the feature, you are navigated to Data Pipeline Studio.
-
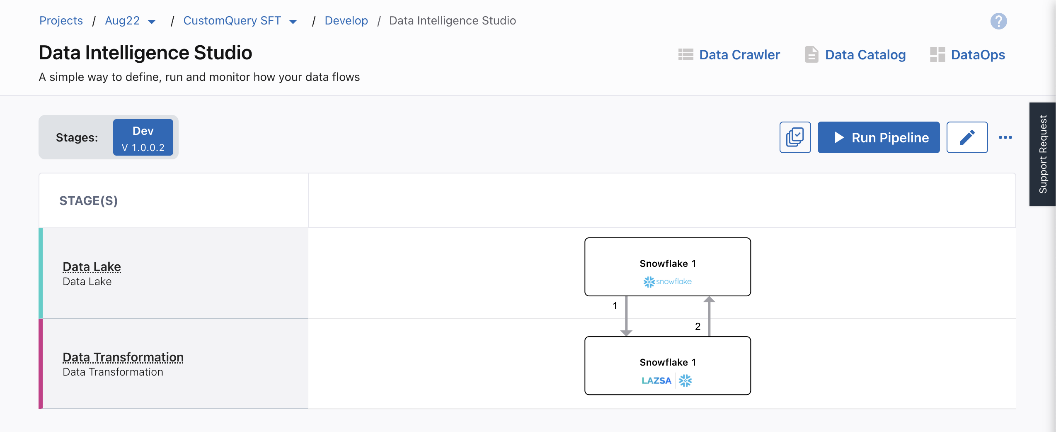
Create a pipeline with the following nodes:
Note: The stages and technologies used in this pipeline are merely for the sake of example.
-
Data Lake - Snowflake
-
Data Transformation - Snowflake
-
-
Click the data lake node to configure it. You can do one of the following:
-
Click Configured Datastore and select a datastore from the dropdown list. The options in the dropdown list are seen only if you have access to one or more configured Snowflake accounts. Select the Warehouse, Database, and Schema from the dropdown options.
-
Click New Datastore. See Create New Datastore
-
-
Click the data transformation node, and then click Create Custom Job. Provide the following information:
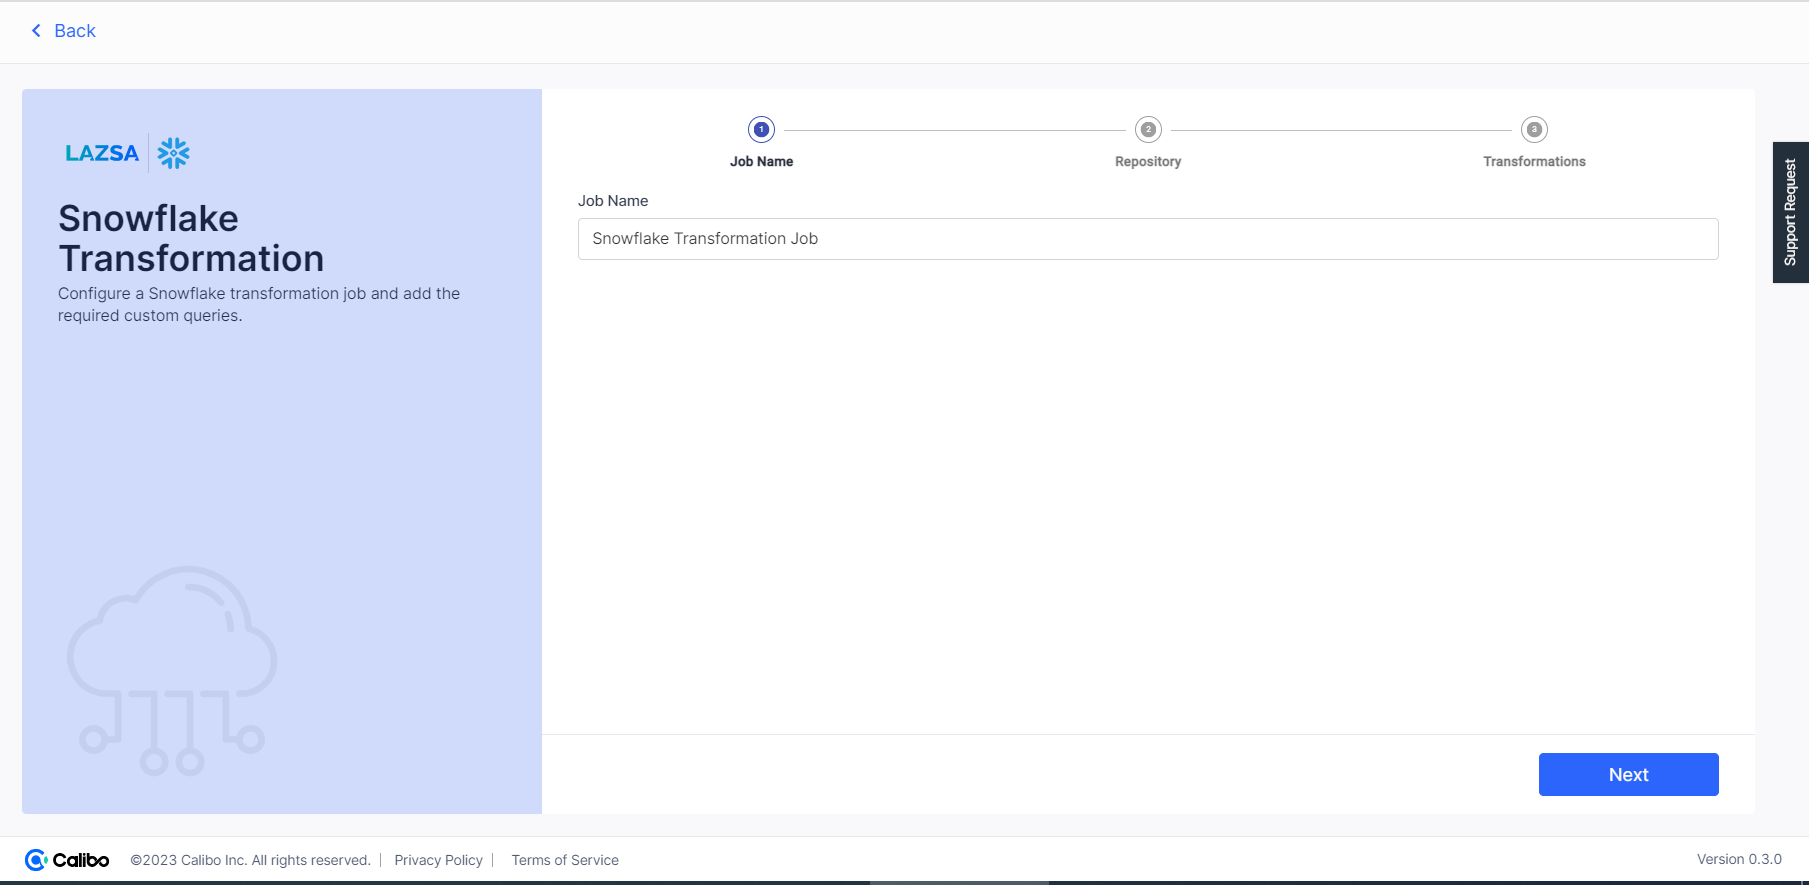
Provide job details for the data transformation job:
-
Job Name - provide a name for the data transformation job that you are creating.
-
Node Rerun Attempts - this is the number of times the pipeline rerun is attempted on this node, in case of failure. The default setting is done at the pipeline level. You can select rerun attempts for this node. If you do not set the rerun attempts, then the default setting is considered.
-
Fault tolerance - Select the behaviour of the pipeline upon failure of a node. The options are:
-
Default - Subsequent nodes should be placed in a pending state, and the overall pipeline should show a failed status.
-
Skip on Failure - The descendant nodes should stop and skip execution.
-
Proceed on Failure - The descendant nodes should continue their normal operation on failure.
-
Click Next.
In this step, you can configure
In case branch template for this feature is already created and repository is selected, then you see the following screen. The repository name, group, and visibility fields are pre-populated with the required information. Do the following:
-
Select a source code branch from the dropdown list.
-
Click Next.

To configure branch template
-
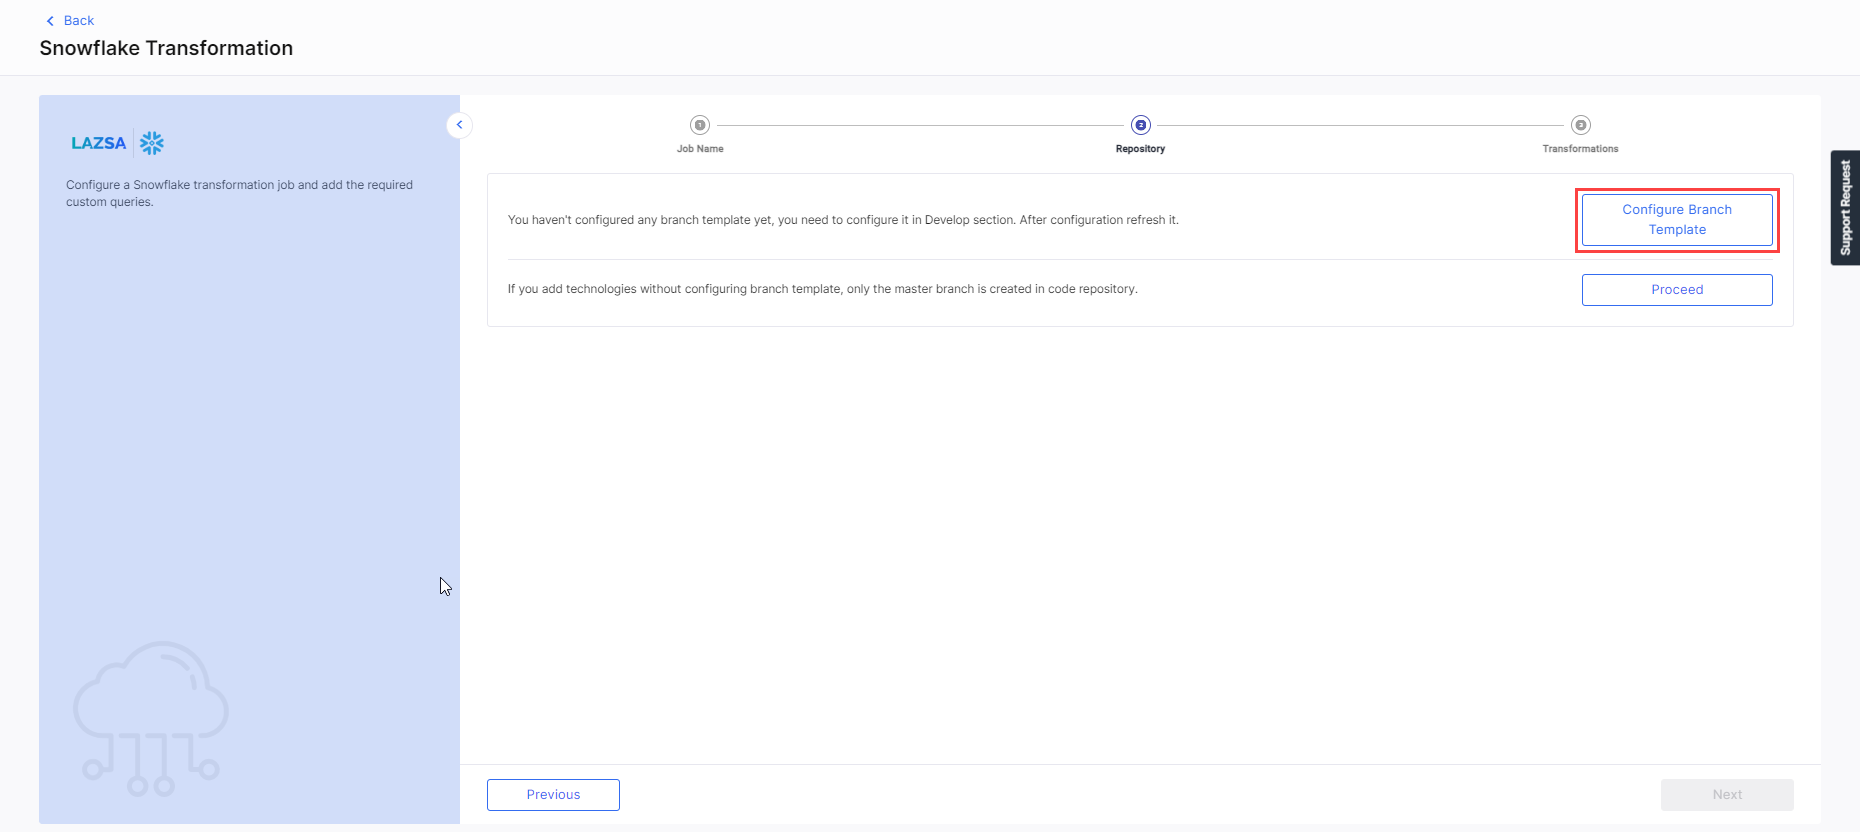
Click Configure Branch Template. You are navigated to the Develop stage of the feature in which the pipeline is created. Click Configure.
-
On the Configure Branch Template screen do one of the following:

-
Select an existing template from the dropdown list and add or delete the required branches.
-
Click + Add More and create branches as per your requirement.
-
-
Click Save.
To configure source code repository
You have the following two options to configure source code repository:
-
Create new repository - click this option and provide the following information:
-
Repository Name - A repository name is provided in the default format. The repository name is populated in the following format: Technology Name - Product Name. For example if the technology being used is Databricks and the product name is ABC, then the repository name is Databricks-ABC. You can edit this name to create a custom name for the repository.

Note:
You can edit the repository name when you use the instance for the first time. Once the repository name is set, you cannot change it thereafter.
-
Group - Select a group to which you want to add this repository. Groups help you to organize, manage, and share the repositories for the product.
-
Visibility - Select the type of visibility that the repository must have. Choose from Public or Private.

Note:
The Group and Visibility fields are only visible if you configure GitLab as a source code repository.
-
Click Create Repository. Once the repository is created, the Repository path is displayed.
-
Select Source Code Branch from the dropdown list.
-
-
Use Existing Repository - Enable the toggle to use an existing repository. Provide the following information:
-
Title - The technology title is added.
-
Repository Name - Select a repository from the dropdown list.
-
Click Next.
In the Transformation step, the Datastore, is preselected.
-
Select the Database and Schema. Add the custom query in one of the following ways:
-
Click Custom Query.
-
Select a table from the dropdown and click Add.

-
After you add the table, you can provide an Alias Name for the table. Click Data Preview to view the data. Click the Delete icon to delete the table.
-
Add the required tables by repeating steps 2 and 3.
-
Enter the query in the Custom Query field. Click Add.

-
This way you can add multiple queries. Once you are done adding queries, click Complete. A message appears that the Snowflake custom transformation job is created.
-
Click Custom Script. Do one of the following:
-
If you have the custom script file ready, click Browse this computer and drop the file.
-
If you want to create the custom script file, click Download Template. Create the file and then upload it.
-
-
Click Complete.
-
On home page of DPS, click Publish to publish the pipeline.
-
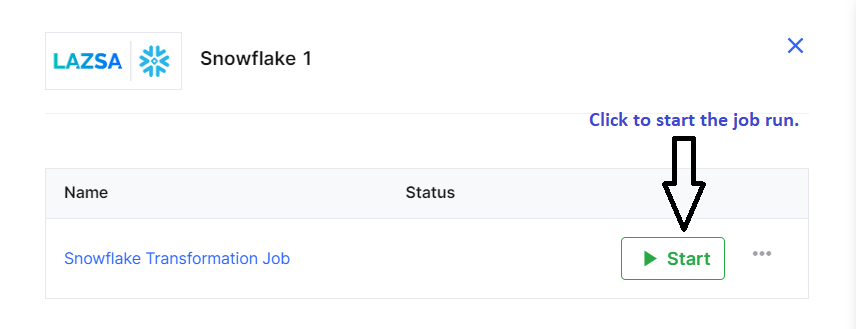
Click the Snowflake Transformation stage and click Start to start the job run.
After the job run is complete how do I view the details?
There are two ways to view the details:
-
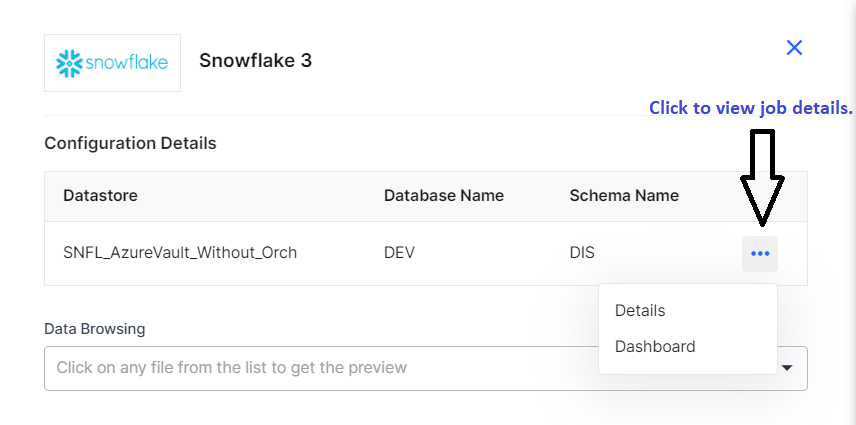
Click on the Snowflake Data Lake node. Click the ellipsis (...) and click Dashboard. You are navigated to the Snowflake dashboard, where you can view the job run details.
-
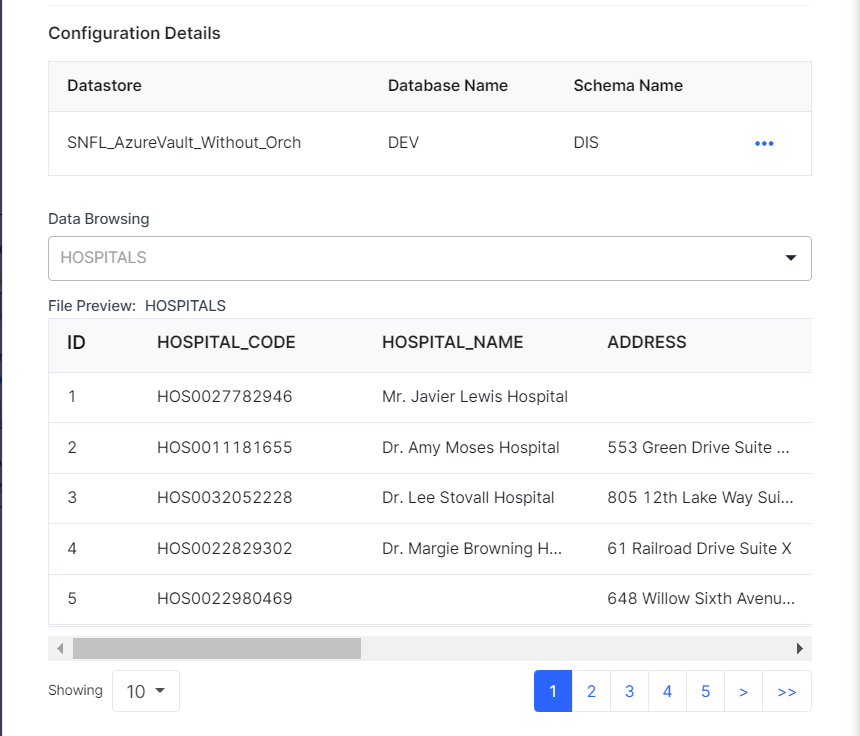
Browse to the table in Data Browsing and view the records from the file.
| What's next? iDatabricks Custom Transformation Job |